When taking photographs, many people don't know how to properly expose the image so that it looks good. It is because images can look different depending on how they are made. These include shutter speed, aperture and ISO. When it comes to getting a good exposure for a photo, these three factors are crucial to understand.
Aperture
The key to mastering photography is knowing the right settings so you get the best exposure. It is important to understand the relationship between ISO, shutter speed and aperture in order to improve the quality of your images.
The aperture, a hole in a lens, controls the amount light that passes through it. It is responsible for determining the depth-of-field in an image. This means more details will be focussed. A wider aperture allows for more light in while a smaller aperture allows for less. A larger aperture results in a shallow depth, while a narrower aperture creates a deeper depth of the field.
An increase in the aperture's F-stop will allow for a larger opening which allows in more light. But this will also lead to a shallow depth field. This is often combined with ISO to increase depth of field.
ISO stands for the sensitivity of the camera’s image sensor. It is the third variable in exposure triangle. It is the most crucial variable of all three because it determines how much light enters the camera sensor.
Shutter speed
Whether you're an amateur or professional photographer, you should understand the exposure triangle. It's an essential part of photography. Combining these three components will help to accurately balance the light that hits your sensor.
The exposure triangle, a visual diagram, shows the relationship of shutter speed, aperture, ISO. Knowing the relationship between shutter speed, aperture, and ISO will help you create a balanced exposure. With an app on your smartphone, or a light-meter, you can calculate your exposure.
Exposure is affected by the aperture. This allows light to pass through its opening. It also affects the depth of field of the image. A wider aperture allows more light into the camera sensor. Conversely, a narrower aperture allows the sensor to receive less light. A higher f stop number indicates a narrower aperture. A lower f-stop signifies a larger aperture.
ISO
Using a camera requires patience and practice. Mastering the exposure triangle is one of the most important things you can do. This will give you more creative control over your images.
The exposure triangle consists of shutter speed, aperture and ISO. Each element works together to create exposure. For example, wide apertures will create shallow depths of field. This will allow you to see more details. Image stabilization can also be used to lower the ISO.
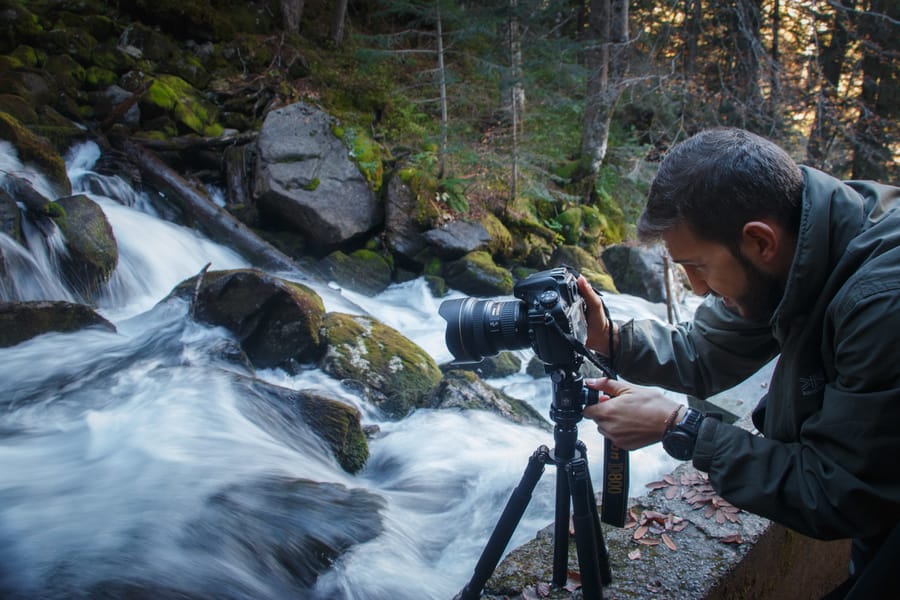
Exposure and shutter speed are directly linked. You will need to adjust the shutter speed if you are photographing a fast moving subject. A tripod can help you achieve a slower shutter speed. This will reduce motion blur.
Also important is the aperture. A larger aperture will allow for more light to reach the lens. However, it will also give you a shallow depth of field. This will alter the image's overall appearance.
Intensity
It is crucial to understand the dynamic relationships among the three elements in the exposure triangle for optimal exposure. It helps you match your vision with the light conditions of the scene you're photographing.
Shutter speed is one element in the exposure triangle. This variable affects the brightness as well as the motion of the image. The slower the shutter speed is, you will capture more light. The shutter speed also freezes any subject's movement. Fast moving subjects will need the next setting, which would be the aperture. A larger aperture will reduce the amount of depth of field and produce a brighter image.
The ISO is the third element. The ISO regulates how much light the camera captures. It is also used to artificially brighten the image. The ISO can be increased to allow the camera maintain exposure. However, this can cause the image to appear too bright.
FAQ
Which Lenses Do I Need?
The most common question beginners ask is, "what lens should I buy?" It's a tough decision since there are so many options available.
The good news is you don't always need to buy a different lens with every purchase of a camera. Instead, you can add lenses later on.
Here are three types of lenses to start with.
-
Wide Angle Lens: 14mm - 24mm: These lenses provide a wide angle of vision, which allows you to capture more details of your subject. You can zoom in to improve image quality.
-
Normal/Standard zoom lens (28mm -70mm). These lenses allow the user to adjust focal lengths while still maintaining good image quality.
-
Telephoto Zoom Lens (70mm - 200mm): These lenses are great for capturing distant subjects. These lenses allow you to focus on your subject, even though they may appear small in the frame.
These lenses can also be combined to produce different effects. One example is to use a regular lens to photograph close-up details and then switch to a long-range lens to capture faraway objects.
Photography is a great job.
Photography is an artistic form that allows one to capture and share moments in time. If you are willing to work hard, photography can be a great way for you to make money. There are many routes to becoming a professional photographer. You could start by taking pictures for friends and family as a hobby. This will improve your skills and increase confidence. Once you are comfortable with this stage, you will be able to move on to paid assignments. The best photographers are able to make a living out of their work. Sometimes they travel with clients to capture images of people having fun at events like weddings or parties. The majority of professionals prefer to shoot commercial projects, such product shots or ads.
The key to becoming a successful photographer is to find out what type of photography you enjoy. Continue to practice, experiment and learn new techniques until your skills are perfected. There is no substitute for experience, so don't expect to succeed overnight.
You should first develop your technical skills before you focus on creativity as a beginner. Photography can be both artistic or technical. The best way to achieve success in photography is to master the fundamentals of composition and use the right tools.
You need to decide if you want a career in photography. Some people choose to combine their passion for photography with other jobs. One example is working at a local magazine or newspaper while taking on freelance assignments. Some people choose to devote all of their time to photography. Whatever the case, success in any creative area requires dedication and commitment.
You will need to put in a lot of effort and time if you are serious about a career as a photographer. You should think about whether this is something you want to dedicate your life to.
How do you get started in digital photography
When you start out in digital photography, the first thing to consider is which type of camera you will use. There are many options: DSLRs (digital Single Lens Reflex Cameras), point-and–shoot compact cameras or camcorders. Each camera has different benefits and features. DSLR cameras can produce high-quality images, but they are usually heavier and more bulky than other types. Point-and shoot cameras are lighter and smaller than other types of cameras and can often be set up automatically for certain situations. Camcorders are capable of recording excellent video quality and can also be used to take still photos. Smartphones are lightweight, portable, and light. They offer excellent image quality, advanced features, such as GPS mapping, music playingback, and Internet browsing.
Once you've decided on the type of camera you'd like to buy, you will need to decide whether you would rather buy a used or new one. If the camera was purchased in the past few years, it is possible to find used cameras at reasonable prices. Because manufacturers invest large sums of money in developing new technology, new models tend to be more expensive.
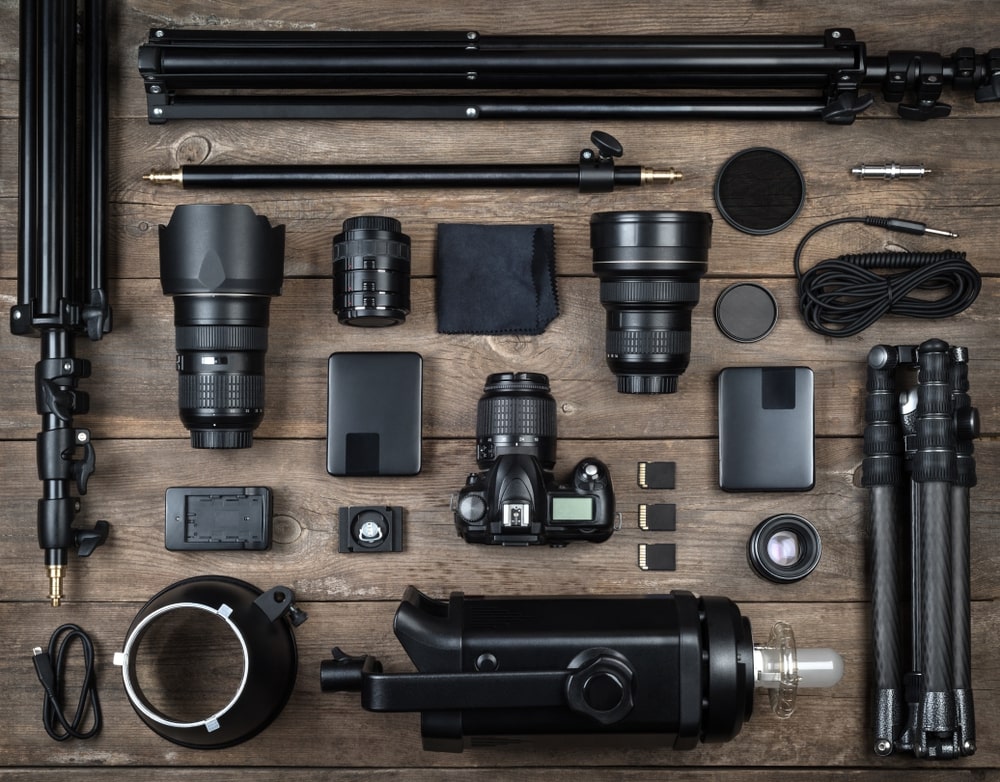
Next, you will need lenses. The quality of your photos is directly affected by the lens. These lenses allow you control the focal length of your lens, which allows you to zoom into the scene and not lose focus. Some lenses are equipped with flash units built in, while others require external flash units. There is a wide selection of lenses available from different brands. Each lens has its own characteristics.
Finally, memory cards are something you should consider. Memory cards are used to store images taken with your camera. Depending on the size of your card, it could hold hundreds or even thousands of pictures. Multiple memory cards are required if you intend to take many pictures.
What makes a good camera bag?
Because it protects your equipment while you are traveling, choosing a camera backpack is crucial. These are the things to consider when shopping for a bag.
-
To comfortably carry your accessories and camera, choose a large bag. Do not buy more than you need.
-
Durability: Bags made of durable materials such leather, canvas and nylon are best. Avoid plastic and fabric bags.
-
Protection: Make your bag waterproof against dirt, moisture and scratches
-
Organization: You can organize your gear by category to make it easier for you to find the right thing. So, you can place your lenses in one box, your memory cards in another and your battery charger in a third.
-
Comfort: Use a shoulder strap to carry your camera instead of a bag. Comfortable designs with padded shoulders are also recommended.
-
Price: Shop around to find the best price. You may find some brands that sell their products at a discount price, which is a great bonus.
-
Warranty: Find out if your company offers a guarantee on its products. This will ensure that you are able to contact the right person if something happens to your bag.
Statistics
- While I cannot prove that all of those spots were not sensor dust, the photo was taken during a heavy snowstorm…so I guess that 99.8% of the spots are snowflakes. (bhphotovideo.com)
- This article received 13 testimonials, and 100% of readers who voted found it helpful, earning it our reader-approved status. (wikihow.com)
- By March 2014, about 3 million were purchased monthly, about 30 percent of the peak sales total. (en.wikipedia.org)
- That's the easiest way to get blurry photos 100% of the time. (photographylife.com)
External Links
How To
How to take pictures in low lighting conditions
Low-light photography means taking photos in dimly lit areas. It requires special equipment. The main challenges include controlling exposure, white balance, and sharpness. Low light photography can be divided into two categories: ambient and flash. Flash photography works well when you have enough light. If there isn’t enough natural lighting, you will need to use a flash. For example, if your subject is indoors but outside, there might not be enough light to capture a good picture without a flash. Try shooting at night, during the moonlit hours, if you don't need a flash. You'll be able to capture beautiful colors and shadows this way. Another option is shooting at twilight. Twilight is the time when the sun has set and there's still daylight.
Long exposures may be something you want to explore. Long exposures let you capture images even after the shutter has been open several minutes. The camera records only light falling on the sensor if it is kept closed. This light continues to fall onto a photo sensor throughout a prolonged exposure. But, the shutter remains closed and no new light enters. As a result, you see very little movement. To ensure a clear image, you should turn off all automatic settings such autofocus or exposure. Before you begin shooting, adjust your ISO setting. An ISO setting of 200 will give you more control over the brightness or darkness of your image. The shutter button should be pressed quickly when you are ready to take the photo. This causes the shutter to close completely. Next, hold the shutter button down until the end. You can prevent any additional light entering your camera by holding the shutter button down. Once you have taken your picture, wait for a few moments before you release that shutter button. This will allow the camera to process your image. While your image processing is taking place, you will be able to view your photos on your screen. Once you're satisfied with them, save them to your computer.