
The term panning refers to horizontal swiveling of the camera. It is common in cinematography as well as photography. For more information, read our panning camera tutorial. We will be covering how to set your panning camera up and how to avoid common mistakes. Grab a tripod to get started. Slow down your shutter speed. We will also discuss maintaining a steady speed of movement. Finally, we'll talk about some common mistakes you can avoid.
Use a tripod
Consider the position of your tripod legs when panning a digital camera. You should move the tripod's thickest legs down, not its thinnest ones, to get the best results. This allows for you to maintain a stable camera and makes it easier to control the centre of gravity. For easier movement of the tripod, you can position one leg in front of the camera and another downward. This makes it much easier to move your tripod legs.
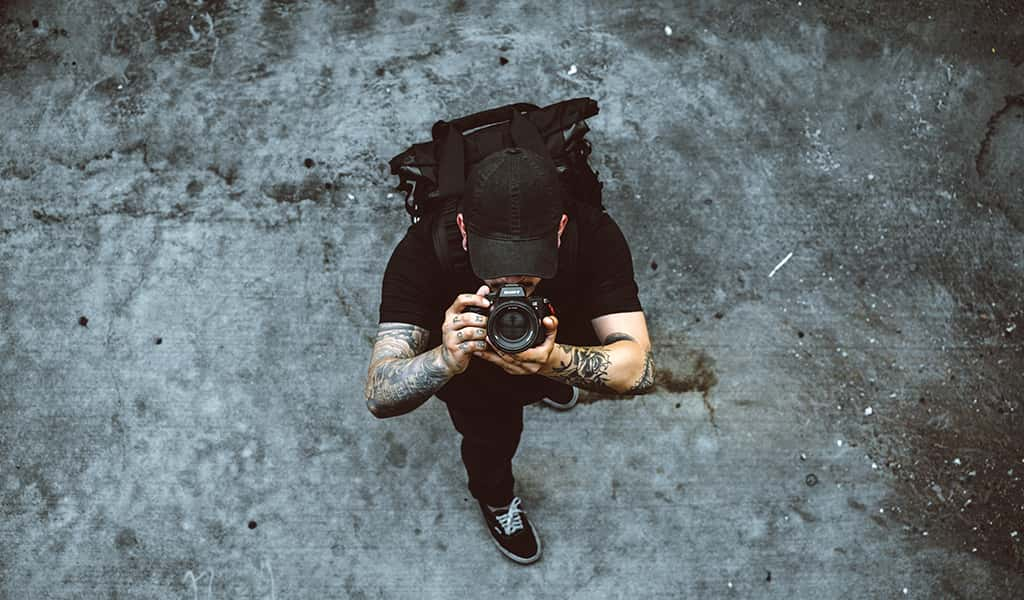
Although you can pan with your smartphone, the best results are achieved with a tripod. Camera shake can easily be avoided with the tripod. While shooting handheld, a slow shutter speed can introduce camera shake and body movement that will manifest as unwanted blurring in the final photograph. Sharp shots are possible by using a tripod for panning. Tripod heads have been specifically designed for smooth panning, so the camera can be sent in any direction.

Slow shutter speed
Slow shutter speeds are best for avoiding streaks in the background when you pan your camera. If you use a speed too fast, the background will blur and it won't be possible to accurately track your subject. Your subject's speed and the length your lens can determine the shutter speed. To prevent motion blur, however, speed is important if your subject is moving quickly.
The best shutter speed to use when panning is f/2.8 or slower. This will ensure that the main focus of interest stays sharp no matter how fast the subject moves. If you stop abruptly, it can cause blurred images. Also, if the subject is in close proximity to the camera, the shutter speed should be f/2.4 and faster. If the subject is near the camera, you will need a faster shutter speed.
A steady rate of motion
Your main goal is to panning your lens in a straight line and match the subject's movement with your camera speed and direction. A camera that is panning does not rotate around its axis. However, it will change its angle of vision and the lenses used in creating the image. This motion can speed up production and require increased precision in direction. Luckily, it is not as difficult as it might sound. To mimic the motion of a cheetah, simply move your head along with it.
You should know how to properly pan the camera. To pan properly, you must start in a kneeling or standing position, press your elbows into your rib cage and plant your feet in a wide stance. When you're standing or kneeling, rotate your hips upward and lift your upper body. Keep your hands from wallowing as you rotate. Instead, lock into a compact position. This will allow for a more steady rotation.
Avoid common mistakes
Panning refers to the process of following a subject and then capturing some of its highlights in sharp focus. This technique is excellent for distinguishing moving subjects from their background and adding motion to images. Photographers make several mistakes when using this technique. Take these lessons and make sure you get the best shots possible. These are the most common mistakes made by photographers when using a handheld camera to pan.
Slow shutter speed. While it may seem straightforward to use a slower shutter speed, the subject's movement won't look natural unless your background is blurred. The shutter speed can be slowed down to prevent blurring of the subject. However, this should only be done slowly. You can use flash bursts to keep the subject sharp. Keep the subject in focus while you pan so you get the best results.
FAQ
Light Room can enhance your photos.
Start early to get the best photos possible for your project. It's always a good idea to take as many pictures as possible and then decide which ones will be the most valuable.
Lightroom makes it easy to do this. It lets you see how different settings impact each photo. These settings can be adjusted on the fly without having to go back into Photoshop. This allows you to quickly test what looks great and what does not.
Photography is a talent?
Photography is an art form, not a talent. It requires training, experience, and practice. It takes years of study and practice to become proficient at any aspect of the craft.
Photography is a business, and you should have a plan on how you're going to make it profitable.
This requires you to identify the type of client you are trying to attract and to find out how to reach them.
You must get to know them and their goals. You need to be able communicate clearly and persuasively in order to persuade your clients to purchase your services.
This means that you will need to be well-organized and prepared when you meet potential clients.
To be ready to meet potential customers, you'll need to build a portfolio. You can either create a portfolio digitally with software programs, or print it on paper.
Once you have created your portfolio, you need to find opportunities to display it. You can either approach businesses directly or advertise online.
Do I Need A Tripod?
This is one question that everyone wants to know. Although a tripod might not always be needed, they can be useful.
It allows you to hold your camera steady when taking pictures at slow shutter speeds. Tripods can be a huge help when you are shooting landscapes or stationary subjects.
A tripod can also cause blurriness when you are photographing people or sports. How do you decide which situations are best served by a tripod.
A tripod is useful in situations where you want to take pictures of fast action and stationary subjects. Examples include:
-
Sports
-
People
-
Landscapes
-
Close-ups
-
Macro shots
You can use this test to determine whether you need a tripod. You can hold your camera still while you look through the lens. A tripod is necessary if you notice blurred lines or movement.
A tripod will not improve blurring if you don't notice it.
Here are some tips for those who do decide to buy a tripod.
-
Make sure your tripod has smooth legs. This will stop unwanted vibrations shaking your camera.
-
Make sure you choose a sturdy tripod. Some tripods can be made out of plastic but they are not very durable. Opt for a sturdy metal tripod.
-
Buy a remote release. You can control your camera remotely with this remote release. Once you press the button, it will automatically fire the shutter.
-
A tripod that can rotate 360 degrees is a good choice. It makes it easy to position your camera horizontally or vertically.
-
Remember that tripods can be expensive. Expect to pay around $100-200. However, you'll get a lot of value for your money.
-
Accessories like memory cards and filters should not be forgotten.
-
Before shopping online, be sure to visit your local shop. Many retailers offer free shipping.
-
To find out what customers think about a product, read reviews.
-
Ask family members and friends who own similar products.
-
For customer feedback, visit message boards and forums.
-
Find user reviews online.
-
Use websites like Amazon.com to compare prices and read customer feedback.
-
See photo galleries to see some of the creative uses for tripods by photographers.
What is the best camera for beginners?
The best camera for beginners depends on your budget, needs, and skill level.
For example, if you're looking to save money, you might choose a point-and-shoot digital camera. These cameras can be very versatile, but they offer excellent quality.
The Digital Single Lens Reflex (Digital DSLR) camera allows you to interchange lenses, allowing you to take different kinds of photos. These lenses are usually more expensive than point-and shoots, but offer greater flexibility.
For beginners to photography, the beginner's set is a great place for you to start. Everything you will need, including a tripod, flash, memory cards and lens, can be found in one package.
Don't forget to buy extra batteries too!
Statistics
- There are people out there who will pick at flaws they can only see in 100% crops of your photos. (wikihow.com)
- By March 2014, about 3 million were purchased monthly, about 30 percent of the peak sales total. (en.wikipedia.org)
- In this case, 100% of readers who voted found the article helpful, earning it our reader-approved status. (wikihow.com)
- Get 40% off Adobe Creative Cloud(opens in new tab) (creativebloq.com)
External Links
How To
How to Take Pictures of Yourself
Portraits are important because they show who you are. Portraits also tell your story. While you may have one favorite photo of yourself as a child, you now want to take something different. It's easy for people to forget how fun it is to take photos. These are some tips that will help you get started.
-
Make sure you have enough light. It is best to take portraits in the morning, or late afternoon. Make sure you don't have direct sunlight shining on your face if you are using flash. It will wash out details. Also, avoid shooting at midday. There will be too much shadow.
-
Use a tripod. The camera will not move if it is held still. You'll lose the opportunity to freeze action. You can also set up your flash first, even if you are using it. After that, turn off the flash again and start over.
-
Photograph close-ups. Closeups are great for showing detail. You might find them a little too realistic if your eyes aren't sharp enough. Pay close attention and observe the noses, eyes, and mouths. Is there anything out of the ordinary? Are glasses worn by someone? Are there freckles under her nose or on her eyes? These details add depth to an individual's appearance.
-
Don't force smiles. Smiles can be tricky. Smiles are tricky. Some people smile naturally when they are happy. Others don't. If you try to force them, it just looks unnatural. You should think about what makes your laugh. You might find something silly, like a cat leaping through a hoops. Or maybe you love watching paint dry. Whatever it is, think about it until you find yourself laughing.
-
Be creative. People think they're boring. However, being boring is not a bad thing. Look for ways to break from the norm. Ask someone to pose behind their back with his hands in front. Another option is to suggest that he wear a funny headgear.
-
Keep practicing. You will improve your ability to capture moments if you keep practicing every day. As you improve, you will be able to see more interesting events around you.
-
Have fun. It should be fun to take photos. If you enjoy the process, you'll be more likely to do it again. You might even end up with some pretty cool photos.
-
Show off your work. Once you learn how to take good pictures, share them with friends and family. Tell them why you took the picture. Show them where it was. Let them know what your experience was.
-
Be patient. Sometimes things just don't click. It happens to everyone. Don't worry. Just move on to another image.